Manage Bucket Backups
- Capella Operational
Bucket backups contain bucket data. You can take a bucket backup on-demand or use a configurable automatic schedule.
Use the procedures on this page to create on-demand bucket backups, schedule automatic bucket backups, and manage bucket backups. To learn more about how bucket backups work in Couchbase Capella, see Back Up and Restore Bucket Data.
To backup an entire cluster, see Back Up and Restore An Entire Cluster.
View and Manage Bucket Backups
|
Permissions Required
To view and manage bucket backups in the Capella UI:
|
Backup options are unavailable in the UI for your free tier operational cluster.
To back-up and transfer your data from your old free tier operational cluster to a new free tier or paid operational cluster, you must use the cbbackupmgr tool.
For more information about using the cbbackupmgr tool, see Backup a Free Tier Capella Operational Cluster.
|
Accessing Bucket Backups in the Capella UI
You can access a cluster’s bucket backups from the Backup page.
-
Open the Backup page for your cluster:
-
With the Projects tab in your organization open, click the project with the cluster you want to work with.
-
With the Operational tab open, select your cluster.
-
Click the Backup tab.
-

Bucket Backup Summary
A cluster’s Backups page shows a summary of the latest backups per bucket that exist for the cluster. You can sort the backup information by bucket name.
Each bucket includes the following information about its most recent backup:
| Field | Description |
|---|---|
Bucket Name |
The name of the bucket. |
Latest Backup |
The last time there was a backup of the bucket, the backup type, the backup size, and how long it took. |
Items |
The number of items in the backup. |
Tombstones |
The number of tombstones, or records for removed items, in the backup. This number includes tombstones for deleted documents and any dropped collections. |
GSI |
The number of Global Secondary Indexes (GSI) in the backup. |
FTS |
The number of Search indexes in the backup. |
CBAS |
The number of indexes for the Couchbase Analytics Service (CBAS) in the backup. |
Event |
The number of eventing functions in the backup. |
Expires On |
The date the backup expires and is deleted. |
Configure Scheduled Bucket Backups
If you have a cluster that uses scheduled bucket backups, your bucket automatically backs up based on the chosen schedule.
Couchbase recommends that you change each bucket’s Backup Schedule according to your Recovery Time Objective (RTO) and Recovery Point Objective (RPO). For example, buckets in production clusters might require a much smaller backup window and a much longer backup retention time period than buckets in development clusters.
You can edit a bucket’s backup schedule when modifying a bucket or from the Backup page for your cluster.
To change a bucket’s backup schedule from the Backup page:
-
Open the Backup page for your cluster:
-
With the Projects tab in your organization open, click the project with the cluster you want to work with.
-
With the Operational tab open, select your cluster.
-
Click the Backup tab.
-
-
Select the bucket you want to change.
-
Click Edit Schedule.
-
If it’s not already selected, use the Bucket list to choose the bucket you want to change.
Using the Bucket list, you can select multiple buckets to bulk edit backup schedules. -
Choose a backup schedule for the bucket according to the relative importance of the workload and data.
-
Select Do Not Backup to not schedule any backups.
Do Not Backup is not recommended for production clusters. It’s intended for development clusters or similar. To set a weekly incremental schedule, see the steps which follow.
-
Choose Set Weekly Schedule.
-
Choose the Day of the week when you want Capella to take the full backup. The default value is
Sunday. -
Set the Start at time of day for the full backup.
Select a Start at time when your application isn’t using Capella heavily unless you’ve chosen a cluster configuration with more capacity than you need.
-
Use the Incremental Every list to set the frequency of incremental backups.
If you change the Start at time, the next incremental backup might happen at a different time than you expect. Capella calculates the Incremental Value backward from the configured Start at time.
For example, Incremental Every is
8 hours, and the Start at time is 4 AM. If the current time is 9 PM, Capella takes an incremental backup at 8 PM, an eight-hour interval backward from 4 AM. If you change the Start at to 6 AM, you would see another incremental backup at 10 PM, two hours after the last backup. The backup occurs at this time because Capella recalculates the eight-hour backup interval back from the new 6 AM Start at time. -
Select Cost Optimized Retention. When selected, the cost optimized retention policy applies to your bucket backup. For more information, see Cost Optimized Retention Policy.
-
Set a Retention Time in line with your data retention policy.
If you selected Cost Optimized Retention, the Retention Time applies only to the monthly restore point.
Capella preserves each backup from
30 Daysto5 Years. After the retention time lapses, Capella schedules the backup for deletion.The Retention Time setting applies to all future backups for a bucket. Changes to this setting do not affect previous backups.
-
-
Click Apply.
The first automatic backup occurs at the next increment of the Incremental Every value, calculated backward from the configured Start at time.
Create an On-Demand Bucket Backup
| Capella keeps on-demand bucket backups for 30 days. |
An on-demand backup of a bucket is always a Full bucket backup. Capella schedules on-demand backups to start immediately.
-
Open the Backup page for your cluster:
-
With the Projects tab in your organization open, click the project with the cluster you want to work with.
-
With the Operational tab open, select your cluster.
-
Click the Backup tab.
-
-
Select the bucket you’re creating an on-demand backup for.
-
Click Backup Now.
-
Use the Bucket list to choose the buckets you want to back up.
-
Click Backup Now.
There can be a slight delay while Capella schedules the bucket backup.
The Activity Log lists on-demand bucket backup events. This includes when a backup was triggered, when it started, and when it finished.
The Backup page shows the details of a bucket’s backup when it’s done.
View Bucket Backup Details
You can view the details of a bucket backup by inspecting it in the Capella UI.
-
Open the Backup page for your cluster:
-
With the Projects tab in your organization open, click the project with the cluster you want to work with.
-
With the Operational tab open, select your cluster.
-
Click the Backup tab.
The Backup page shows the details of the most recent backup for each bucket in the cluster.
-
-
Select the bucket with the backups you want to view.
The bucket page lists recent backups grouped by the on-demand and scheduled backup types:
Each bucket backup has the date and time it was created, the backup type, and the expiry time. A Scheduled bucket backup also includes a number for the backup’s position in the backup series.
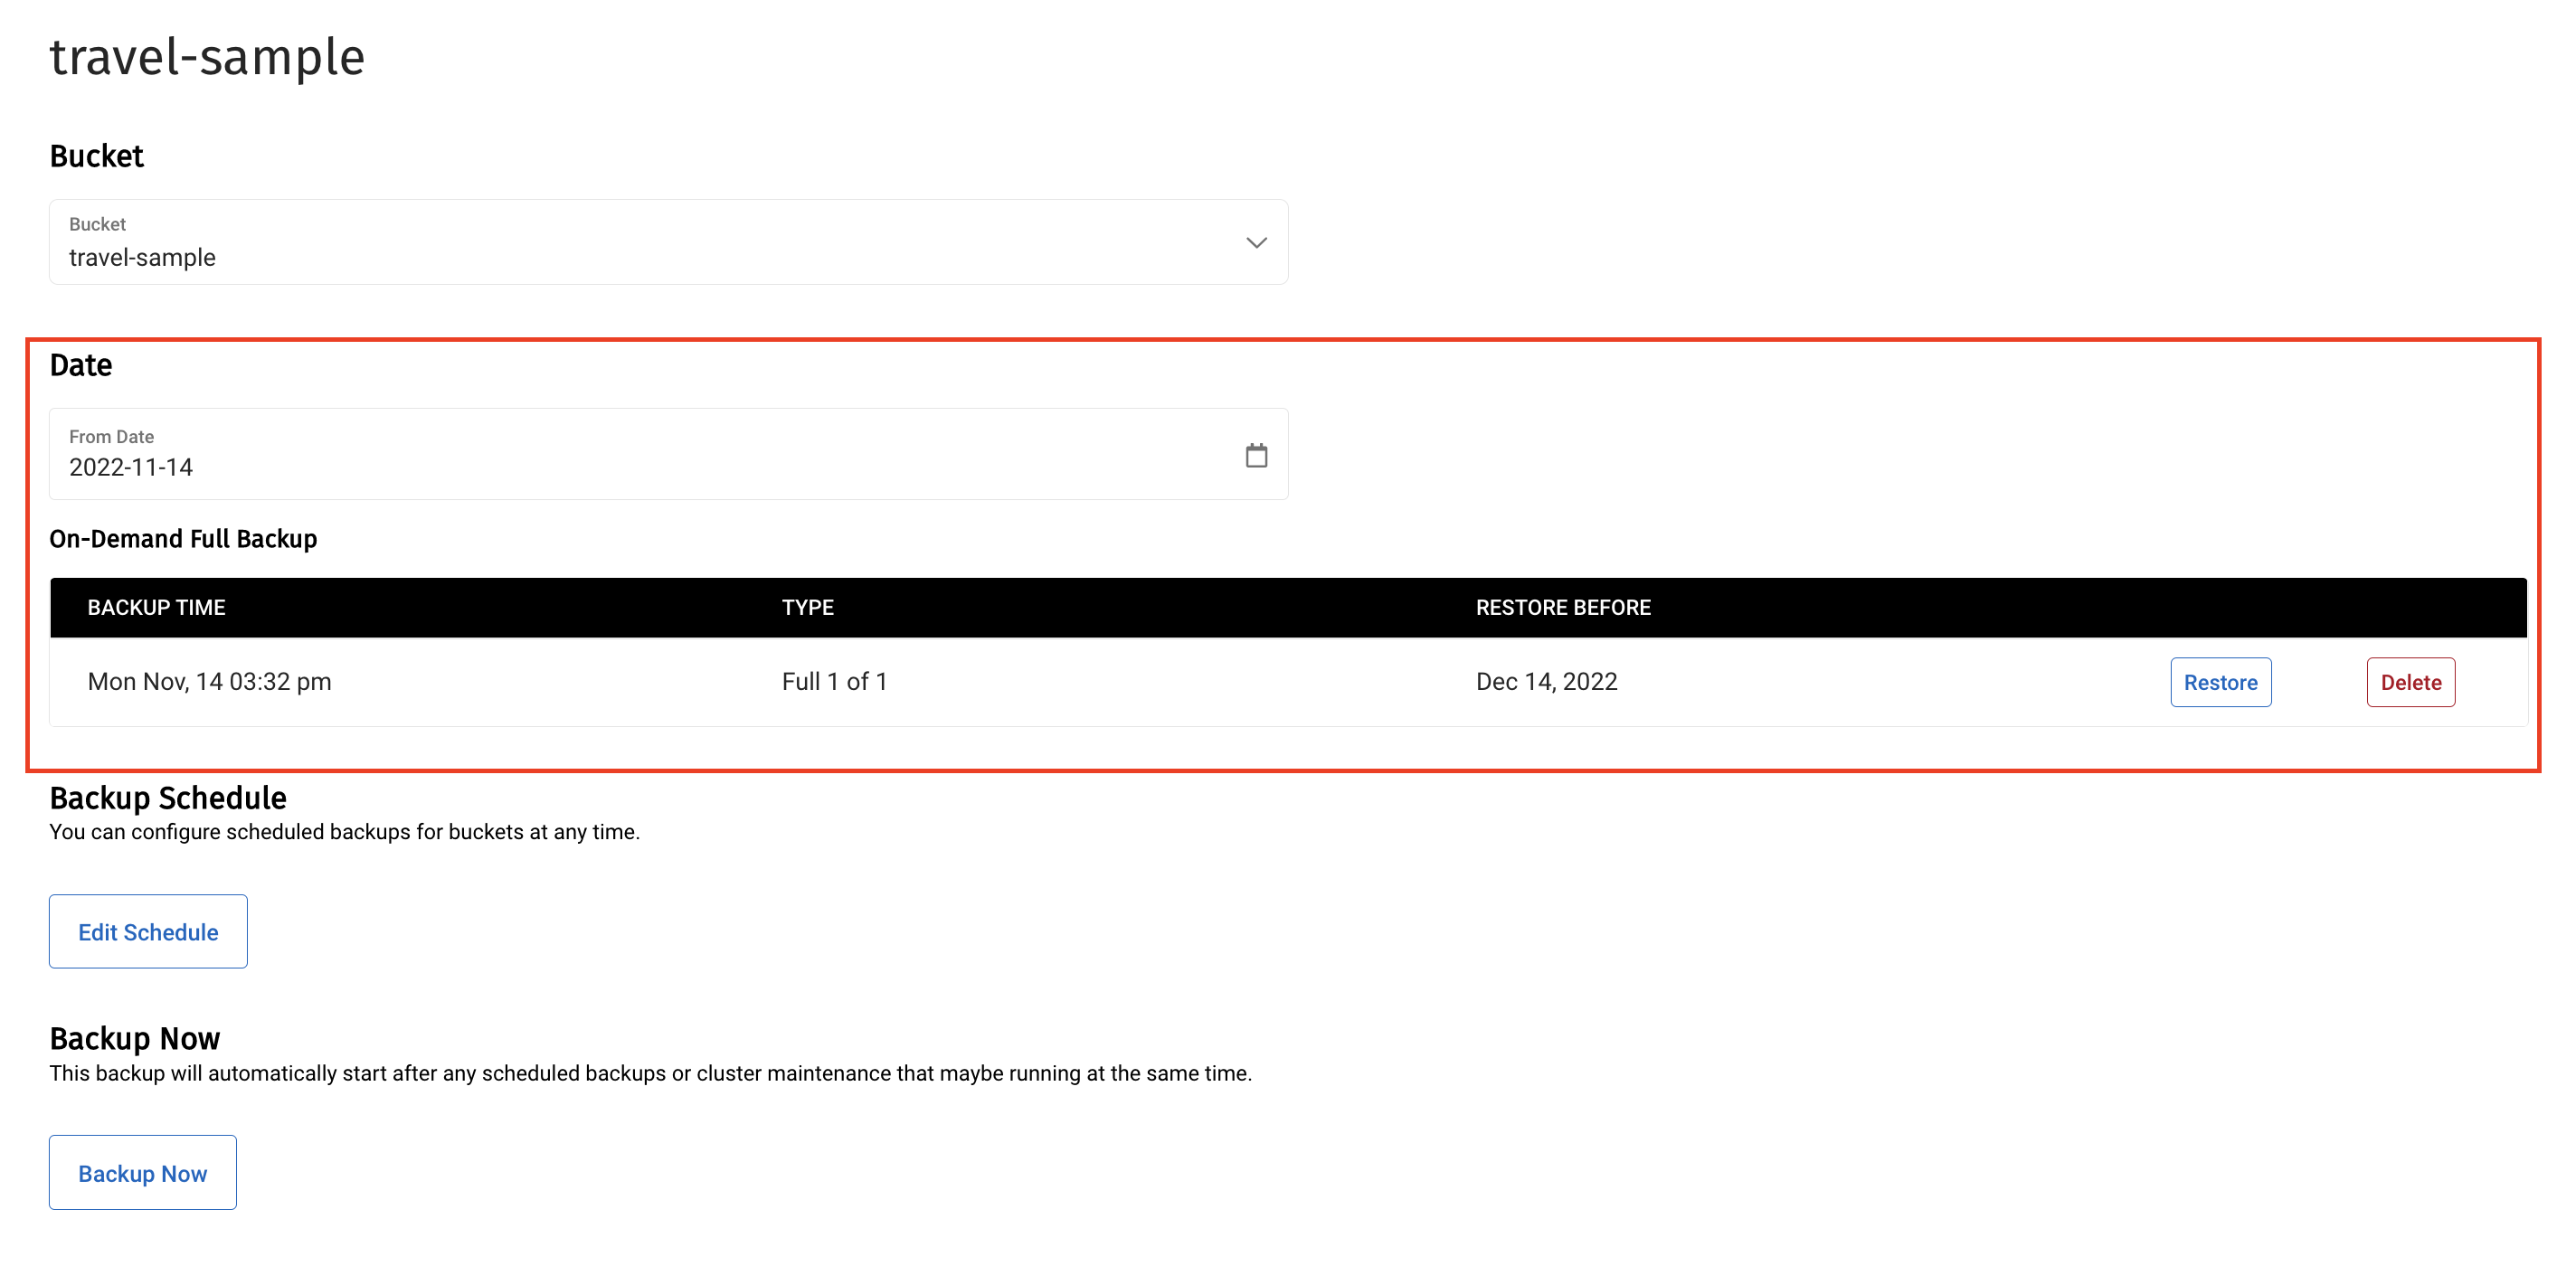
View Bucket Backups by Date
A bucket’s page shows backups for the current backup cycle. To view backups that belong to previous cycles:
-
Use the From Date date picker to select the start date for the backup cycle you want to view.
Choosing a new From Date automatically refreshes the page to show scheduled and on-demand bucket backups based on this new date.
Delete a Bucket Backup
| Deleting a bucket backup is a permanent action. |
When you delete a cluster, you also delete its bucket backups. When you delete a bucket, Capella keeps its backups until their configured retention time.
In Couchbase Capella, bucket backups are deleted as follows:
- Manual deletion
-
You can manually delete a set of scheduled bucket backups or individual manual bucket backups. You cannot undo a bucket backup deletion.
-
Open the Backup page for your cluster:
-
With the Projects tab in your organization open, click the project with the cluster you want to work with.
-
With the Operational tab open, select your cluster.
-
Click the Backup tab.
-
-
Select the bucket with the backups you want to delete.
-
Click Delete for the bucket backup you want to delete.
If you’re deleting a scheduled series of bucket backups, delete the most recent backup.
-
Confirm the bucket backup deletion request.
-
Type
deleteinto the provided field. -
Click Delete Backup.
-
-
- Exceeding the retention time
-
If a bucket backup’s age is greater than the retention time set in the Backup Schedule, Capella automatically deletes the bucket backup.
- Deleting a cluster
-
If you delete a cluster with bucket backups, all the backups stored in the cluster are also deleted.
Download a Bucket Backup in the Capella UI
You can download bucket backups from the Capella UI or using wget.
Prerequisites
-
You must be a
Project Owner.
Procedure
To download a bucket backup in the Capella UI:
-
From the Backup tab for your cluster, select a bucket.
-
Navigate to one of the following pages:
-
Bucket Backup
Contains the latest and partially completed backups for a selected bucket. You cannot download a backup series (backup cycle) where all incremental bucket backups are not complete.
-
Completed Backups
Contains all completed backups for a selected bucket.
-
-
[Optional] Filter by backups, a date range, or a type. For example, Scheduled or On-Demand backup types.
-
[Optional] Expand a backup card to view its details.
-
Click Download on a bucket backup.
A dialog box is displayed.
-
Click Proceed to start the download file creation.
-
An email is sent to you when the downloadable bucket backup file is ready.
-
After receiving an email, from the Backup tab for your cluster, select a bucket, and click Downloadable Backups.
A list of ready-to-download bucket backups is displayed.
-
Click Copy URL on the appropriate downloadable backup.
You have up to 12 hours after the download file has been created to copy the Download URL. Each copy generates a unique URL. After you copy the download URL, it expires in 1 hour. You must start the download before the URL expires. After starting the download, you have at least 12 hours before the download file is removed.
-
To download the file using a browser, paste the download URL into a browser window and Enter.
The .zip file containing the bucket backup is downloaded. The downloaded file is a zip of a cbbackupmgr archive.
-
Unzip the downloaded bucket backup zip archive file in an appropriate location.
-
Use the Couchbase cbbackupmgr utility to view, examine, or restore the bucket backup.
Download Using wget with the Download URL
You can download the bucket backup zip archive file using an utility like wget or curl.
To download using wget:
| Description | Action |
|---|---|
To use the filename set in the response-content-disposition/content-disposition option of the download URL. |
wget --content-disposition "<download_url>" |
To rename the file when downloading using the download URL. |
wget -O capella_cluster_testbucket1_backup_0219.zip "<download_url>" |