Classic Editor
A classic editor is an advanced tool where users can directly configure the index mapping.
It is intended for users already familiar with the concepts of full-text search.
To create an index, through the classic editor, left-click on the Add Index button towards the right-hand side.
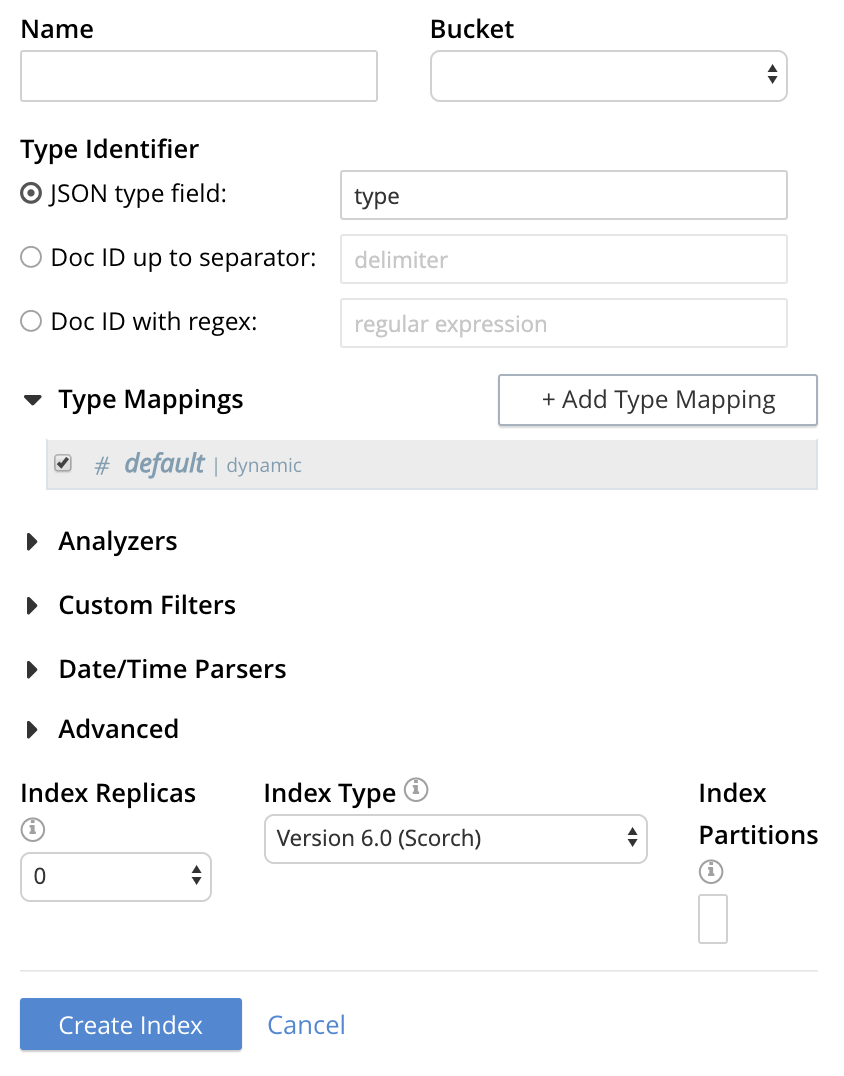
The Add Index screen appears.

To define a basic index on which Full Text Search can be performed, begin by entering a unique name for the index in the Name field, on the upper-left: for example, travel-sample-index. (Note that only alphanumeric characters, hyphens, and underscores are allowed for index names. Also note that the first character of the name must be alphabetic.) Then, use the pull-down menu provided for the Bucket field, on the upper-right, to specify the travel-sample bucket:

This is all you need to specify in order to create a basic index for test and development. No further configuration is required. Note, however, that such default indexing is not recommended for production environments since it creates indexes that may be unnecessarily large, and therefore insufficiently performant.
To save your index, left-click on the Create Index button near the bottom of the screen:
At this point, you are returned to the Full Text Search screen. In the Full Text Indexes panel, a row now appears for the index you have created. When left-clicked on, the row opens as follows:

| The percentage figure appears under the indexing progress column and is incremented in correspondence with the build-progress of the index. When 100% is reached, the index build is complete. However, search queries will be allowed as soon as the index is created, meaning partial results can be expected until the index build is complete. |
Once the new index has been built, it supports Full Text Searches performed by all available means: the Console UI, the Couchbase REST API, and the Couchbase SDK.
| If one or more of the nodes in the cluster running data service goes down and/or are failed over, indexing progress may show a value > 100%. |
Using Non-Default Scope/Collection
Search indexes can be created on non-default scopes and collections, providing the ability to make an index more personal or use case specific and also resulting in a lower index size.

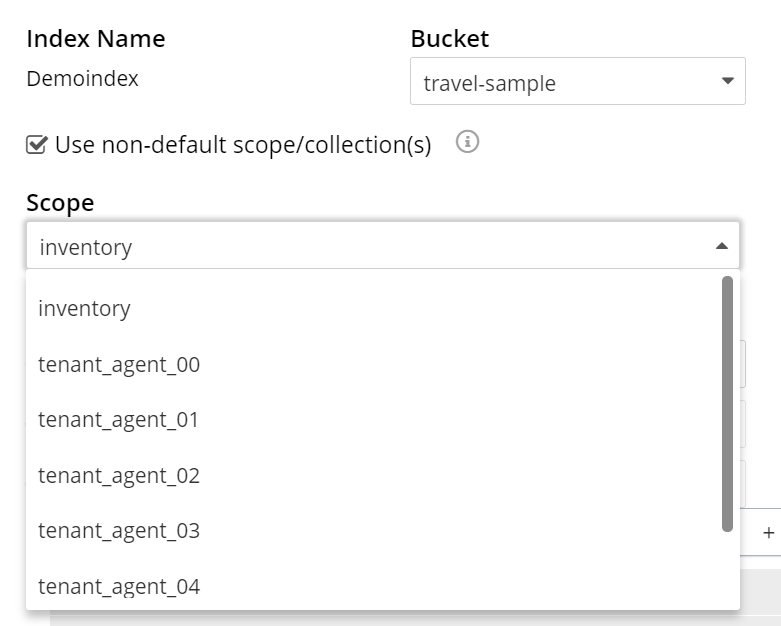
Select this checkbox if you want the index to stream data from a non-default scope and/or non-default collection(s) on the source bucket.
To specify the non-default scope, click the scope drop-down list and select the required scope.

The Search service allows you to index as many collections as you want in a scope by using Type Mappings. For further details on creating an index on non-default collection(s), see Specifying Type Mapping for Collection to review the wide range of available options for creating indexes appropriate for production environments, see Creating Indexes.
| An index can be created only on a single scope. However, within a scope any number of collections can be indexed. |
Using the Index Definition Preview
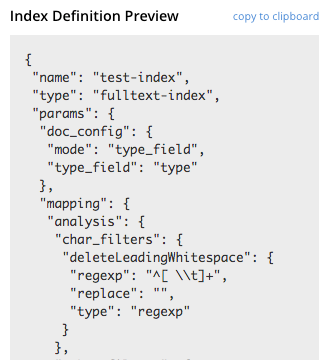
The Index Definition Preview appears to the right-hand side of the Edit Index screen. Following index-definition, the upper portion may appear as follows:

The preview consists of the JSON document that describes the current index configuration, as created by means of the user interface. By left-clicking on the copy to clipboard tab, the definition can be saved.