Connect your Apps to an App Endpoint
- Capella Operational
Couchbase provides Couchbase Lite: an embedded, NoSQL JSON-document Style database for your mobile apps.
You can use Couchbase Lite as a standalone embedded database within your mobile apps, or with Couchbase Capella’s App Endpoints to provide a complete cloud to edge synchronized solution. Couchbase Lite runs on the following platforms:
Setting up the Connection
You must configure your App Endpoint before your mobile application can connect to it.
-
From the project page, select the App Services tab.
-
From the App Services screen, you can select the App Endpoints tab.
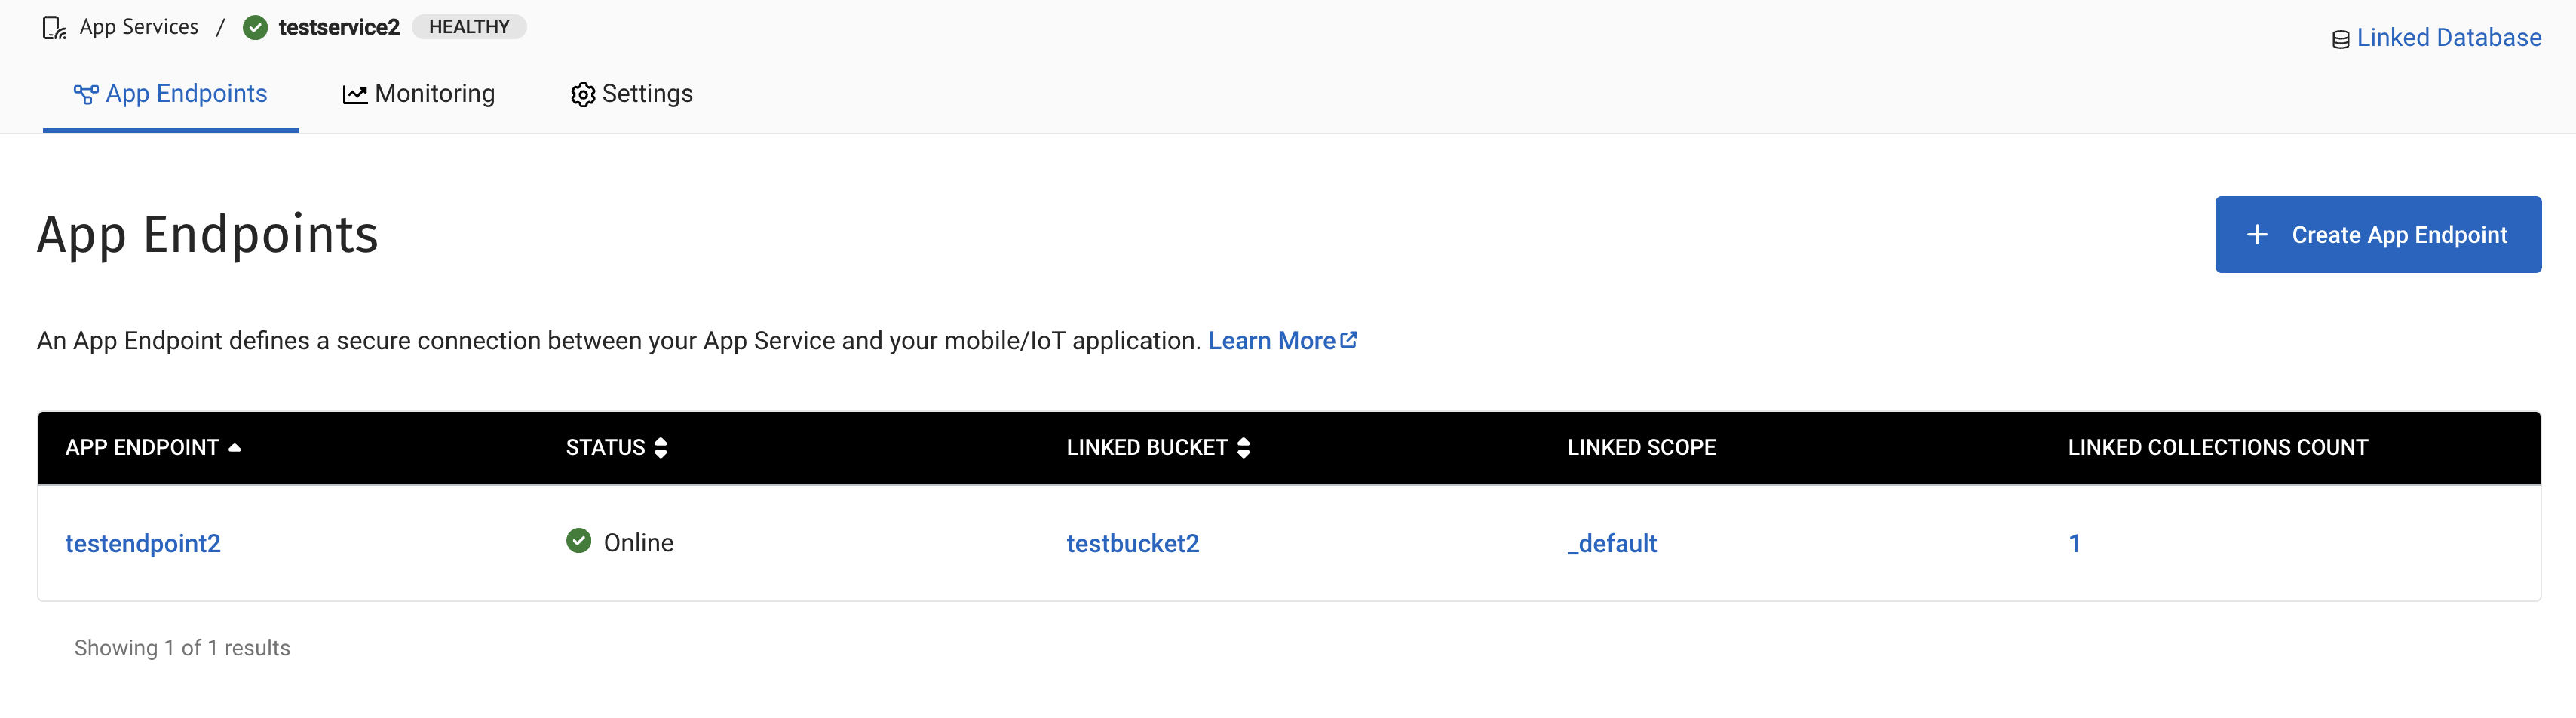 Figure 1. Select App Endpoint
The next screen will allow you to configure the endpoint.
The connection configuration screen can be found within the connect tab of your App Endpoint.
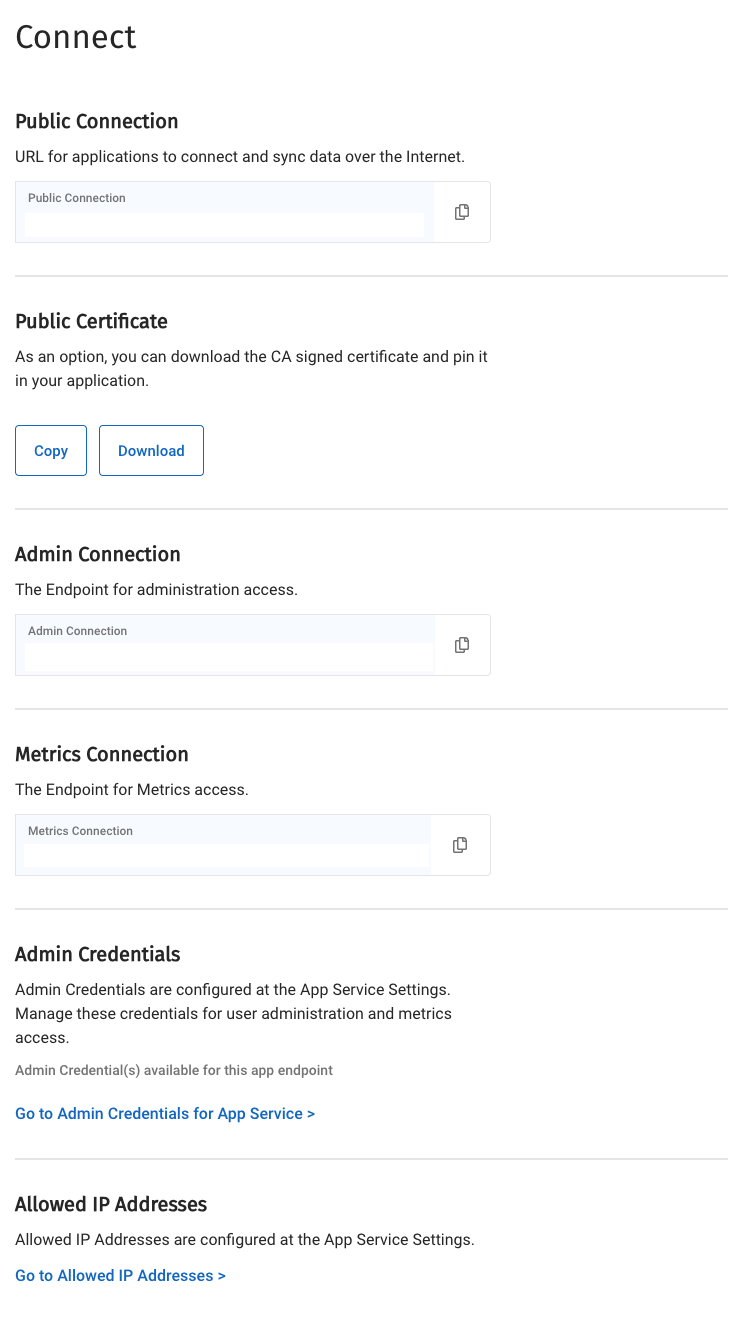 Figure 2. Locate App Endpoint connect tab
From here, you can configure the App Endpoint connection settings:
- Public Connection
-
This setting is created when the App Endpoint is created. This is the address which your mobile application uses to connect to the endpoint.
- Public Certificate
-
The public certificate is a trusted Certificate Authority (CA) signed certificate. You can copy or download the endpoint’s SSL public certificate to bundle into your mobile application.
You can download your public certificate, but Couchbase recommends against pinning your certificate to your App. Pinning your certificate can increase maintenance overhead and downtime risks.
|
Capella rotates the certificate yearly. If you have pinned the certificate, you will have to update your app to use the new certificate when the old one expires. Capella will notify you via email starting 1 month before the certificate is scheduled to expire (if you have enabled email notifications on your account.) To update your app with the new certificate ahead of the scheduled expiration, please contact Support. If, however, you do not pin the certificate, your app will continue to operate after certificate rotation with no downtime and no action required. |
- Endpoint for Admin Access to the database
-
To ensure your service is as secure as possible, the App Endpoint uses a separate URL for executing REST API administration functions.
- Manage Credentials for user administration and metrics access
-
You will need to set up credentials for accessing the endpoint’s administration and metrics functions.
-
Click the Go to Admin Credentials for App Services → link to access the
Manage Credentialsscreen. -
Fill in the User Name field
-
Your username must be unique within the App Service.
-
-
Fill in the Password field according to the following criteria:
-
A minimum of eight characters including one uppercase, one lowercase, a number and a special character.
-
-
Specify which App Endpoints the user with admin credentials has admin privileges over.
-
You can select specific App Endpoints from the drop down menu or click the checkbox to apply the admin credential to all current and future App Endpoints within the App Service.
-
-
Then, click on Create Admin Credential:
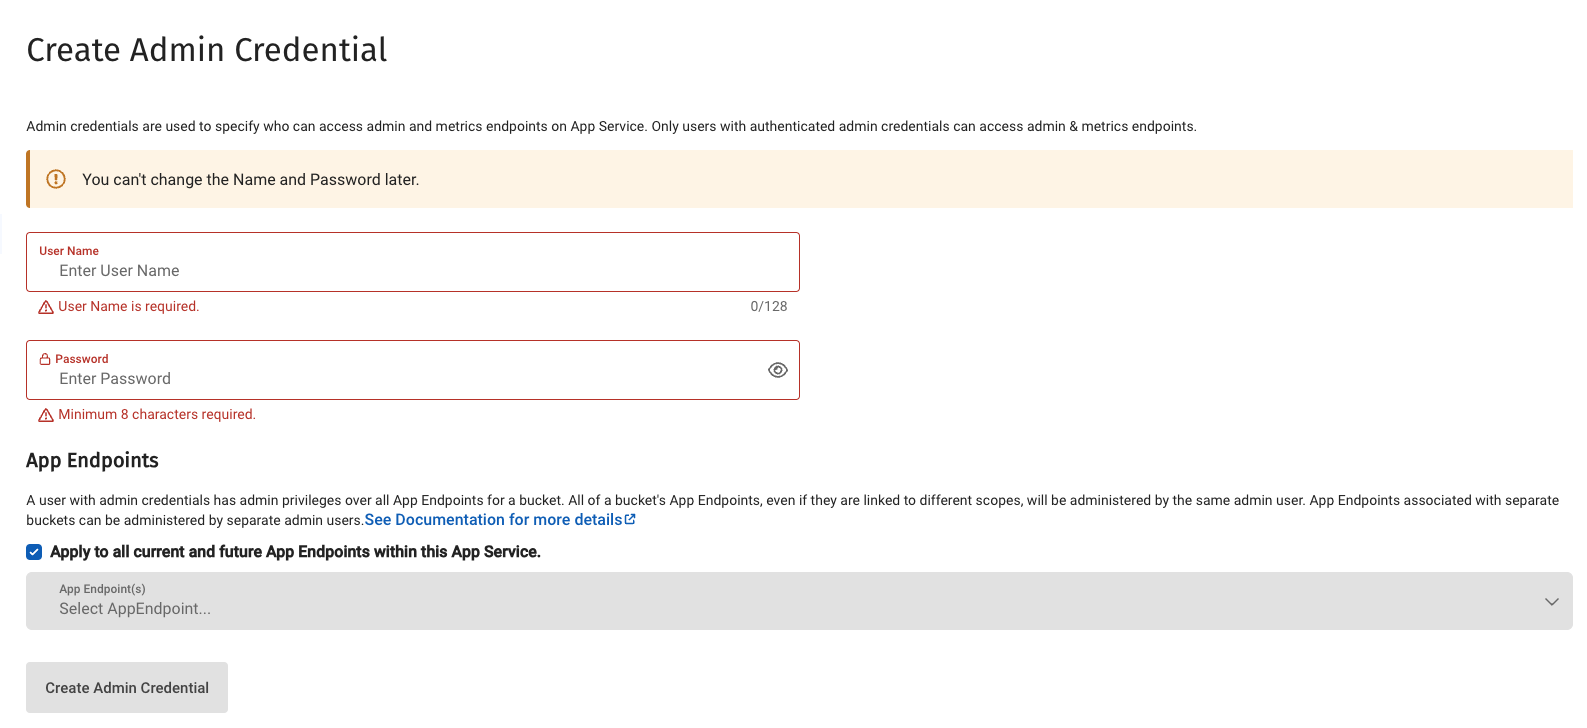 Figure 3. Creating Admin Credentials for an App Endpoint
-
- Allowed IP Addresses
-
Any IP that requires a connection to the endpoint must be registered here. Click on Go to Allowed IP Addresses > to access the screen, then click the + Add Allowed IP link.
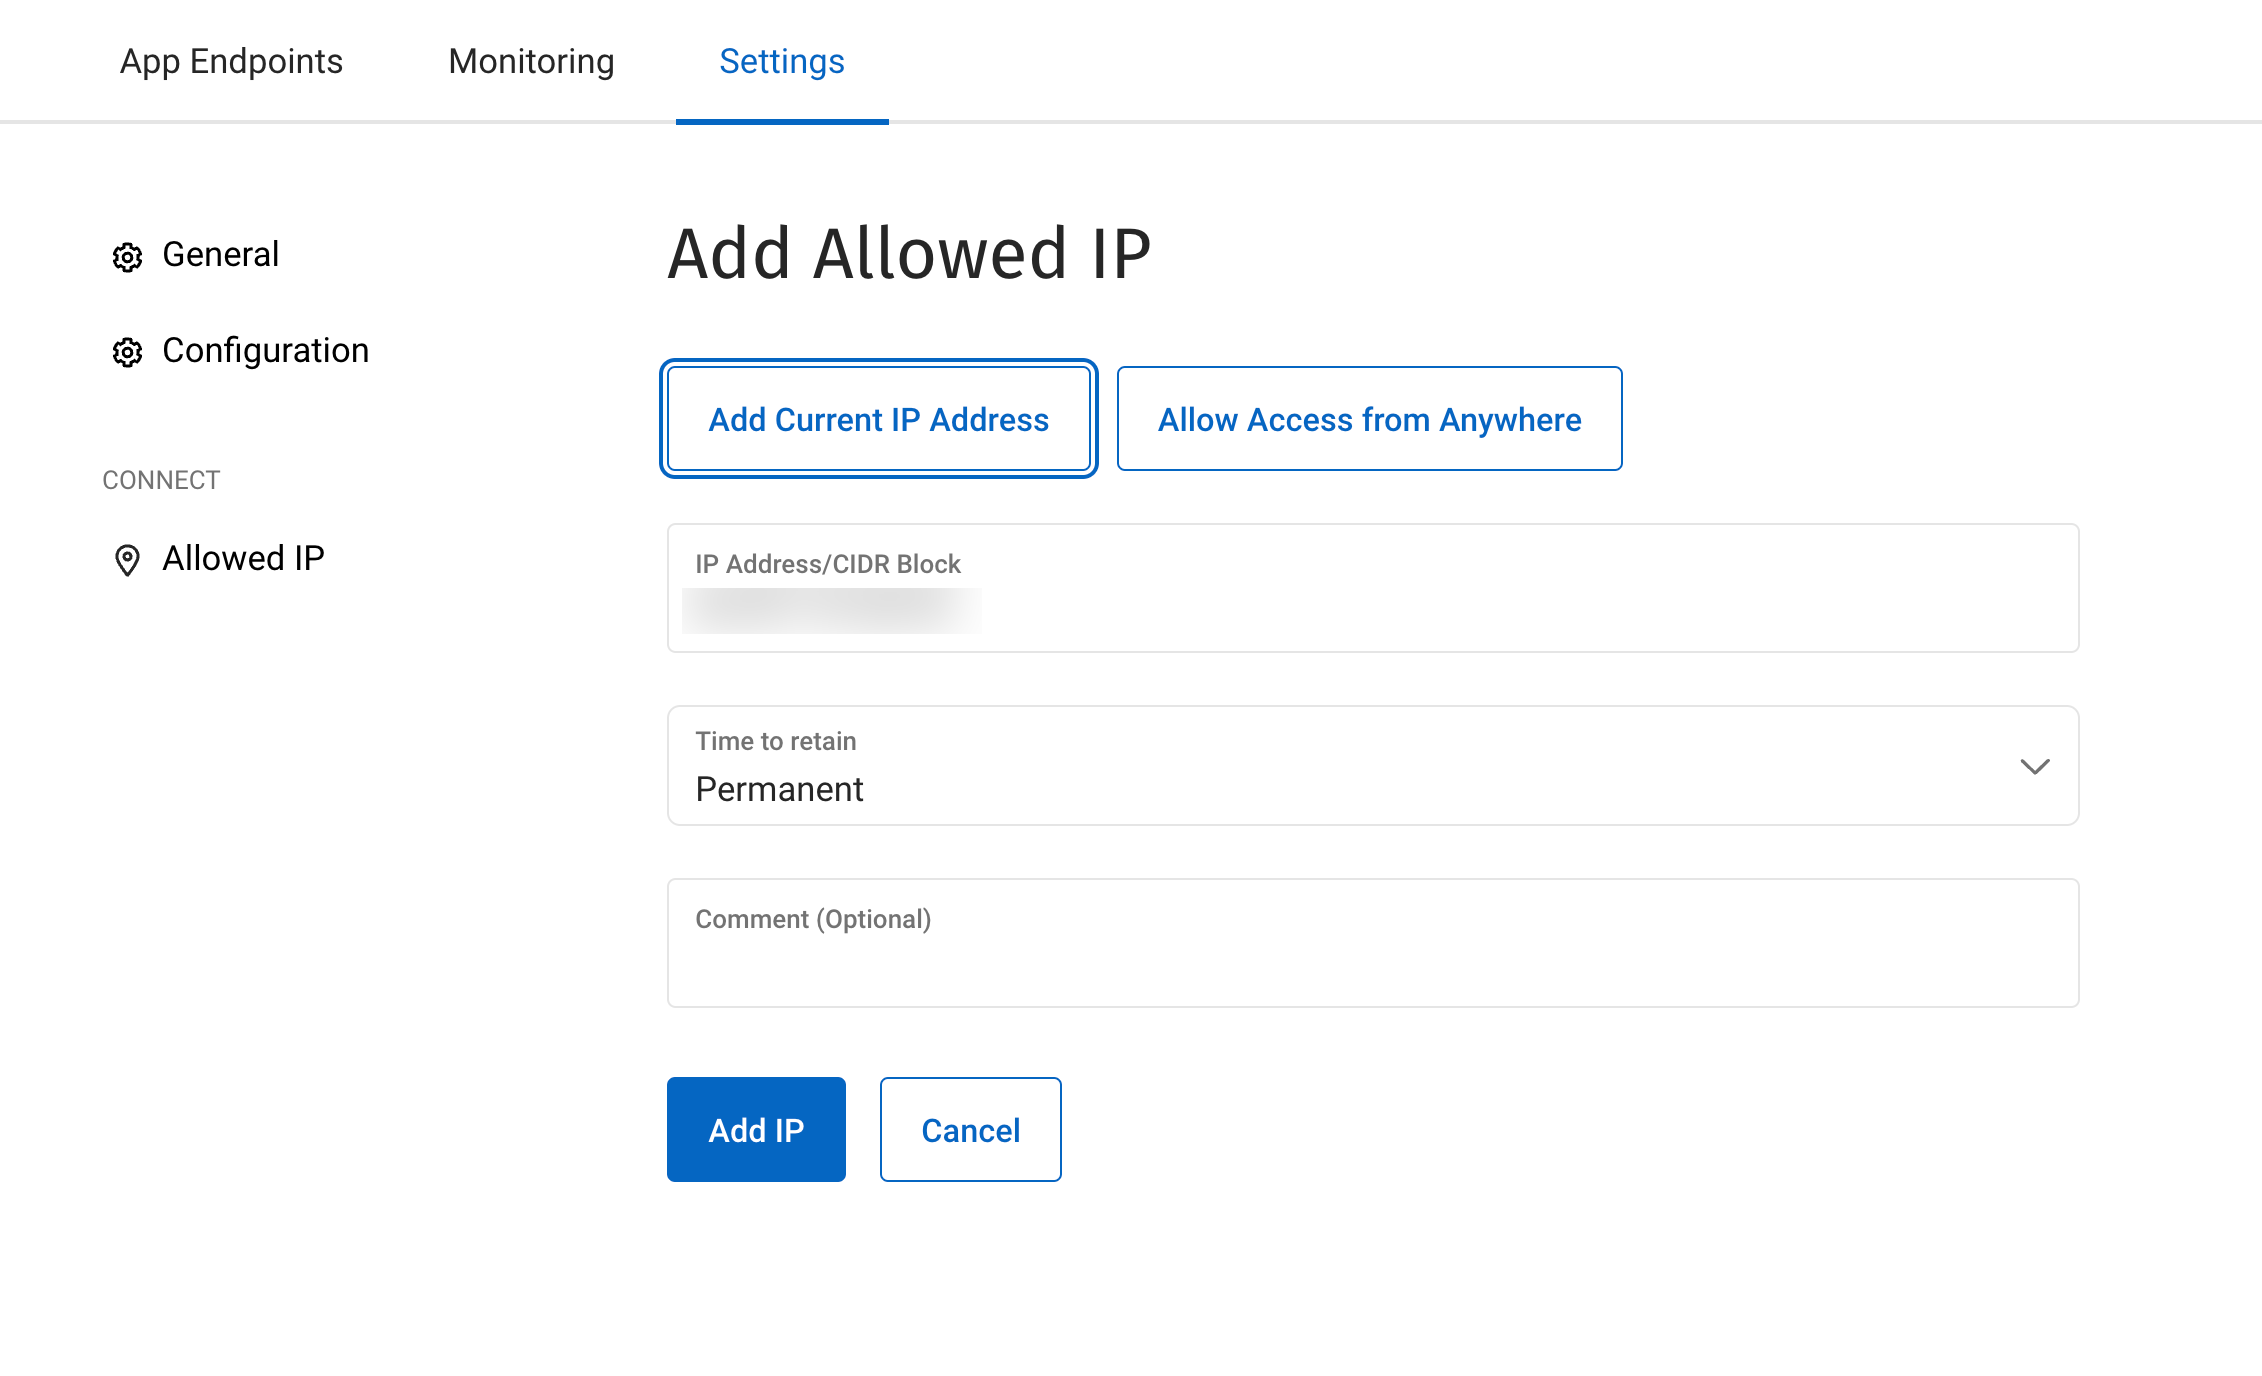
You can fill in the allowed IP address, or click Add Current IP Address to fill in the IP address of the machine you’re using.
You can also press Allow Access from Anywhere to allow access to your endpoint from any location.
You can add an expiry date to the entry, which may be used, for example, to allow temporary access to the endpoint for testing.
Syncing Data to a Client Application
Once the App Service has been configured, data synchronisation can be initiated from client application using calls to the Couchbase API.
In this example, first open the local database for syncing from the Capella App Service.
The client application uses the address of the endpoint to sync its local databases.
The App Endpoint address can be found under the Connect tab of App Endpoint configuration (See Figure 2).
let db = try! Database(name: "travel-sample")

guard let targetURL = URL(string: "wss://gaoca1lnIxwdumid.apps.endpoint.com:4984/test-endpoint")
else {
    fatalError("Invalid URL")
}
Now create a configuration linking the local database to the App Endpoint. Set the sync to run bidirectionally.
The authenticator takes the username and password set up when the App Endpoint’s user was created (See Create App Users).
let targetEndpoint = URLEndpoint(url: targetURL)

var config = ReplicatorConfiguration(database: db, target: targetEndpoint)
config.replicatorType = .pushAndPull
config.continuous = false

config.authenticator = BasicAuthenticator(
    username: "test-user",
    password: "password")
Finally, start syncing.
let replicator = Replicator.init(config: config)
replicator.start()