Restore a Bucket Backup
- Capella Operational
You can restore a bucket backup to the same cluster where it was created or another cluster in the same organization.
Use the procedures on this page to restore data from a bucket backup. For more information about how to create and manage bucket backups, see Manage Bucket Backups. For more information about how bucket backups work in Couchbase Capella, see Back Up and Restore Bucket Data.
To backup or restore data for an entire cluster, see Back Up and Restore An Entire Cluster.
Prerequisites
|
Permissions Required
To view and restore bucket data from a backup:
|
-
The source cluster that created the bucket backup must still exist.
-
You can only restore bucket backups to a cluster running the same major version or later as the cluster that created the bucket backup.
-
You can only restore data to an existing bucket with the same name and conflict resolution methods as the bucket from the backup.
-
Because of how Capella stores backups, you can only restore to a bucket in the same Cloud Service Provider (CSP) as the one used to create the backup — such as from Azure to Azure. If you need a backup that can be restored across different CSPs, you can use a locally-stored bucket backup — see Downloadable backups, or the cbbackupmgr command line tool.
Restore a Bucket
Couchbase recommends that you only restore data from bucket backups in worst-case scenarios. You should use other recovery methods, such as XDCR replication from a redundant cluster as the primary recovery method.
|
Capella resolves any conflicts during the restore with the conflict resolution method configured for the buckets. For example, if a key-value pair in the target bucket is newer than the one in the backup, then the one from the backup is not restored unless otherwise specified in the restore settings. |
-
Open the Backup page for your cluster:
-
With the Projects tab in your organization open, click the project with the cluster you want to work with.
-
With the Operational tab open, select your cluster.
-
Click the Backup tab.
-
-
Select the bucket you want to restore.
-
Click Restore for the bucket backup you want to restore.
Clicking the From Date date picker allows you to select a previous date for a backup cycle or on-demand bucket backup. -
Specify the Destination Cluster.
The restore location can be the current cluster (chosen by default) or a different cluster in your organization. If you select Restore to a different cluster, the Cluster list appears.
-
When restoring to a different cluster, use the Cluster list to select the cluster that’s the destination of the restore. You can only restore to a cluster in the same organization.
-
-
Choose the Services to Restore.
-
Select each service you want to restore. By default, all options are selected. You must select at least one service.
-
-
(Optional) Apply Other Options.
-
Overwrite Documents From Backup
When enabled, this option overwrites later versions of documents with earlier versions from the bucket backup. By default, this option is deselected.
-
Automatically Remove Deleted Collections
When enabled, this option removes empty collections from the restore. By default, this option is deselected.
-
Filter Keys
Use this field to enter a regular expression (RE2) to filter keys. You can use Filter Keys to restore a specified portion of your dataset from the bucket backup.
-
Filter Values
Use this field to enter a regular expression (RE2) to filter values. You can use Filter Values to restore a specified portion of your dataset from the bucket backup.
-
Map Data
This field allows you to map data from the backup to differently named data containers on the cluster. For example, buckets can be remapped to other buckets (
bucket=newbucket), scopes and collections to other scopes and collections in the same bucket (bucket.scope=bucket.newscopeorbucket.scope.collection=bucket.scope.newcollection). Map sources can only be specified once and cannot overlap. -
Include Data
Use this field to restore only specific data containers from the bucket backup. Use the following format for Include Data items:
bucket.scope, orbucket.scope.collection.As bucket names can contain periods, they must be escaped: my\.bucket.my-scope.Included data can only be specified once and cannot overlap, for example
bucket1andbucket1.scope1. -
Exclude Data
Use this field to define any buckets, scopes, or collections you want to exclude from the restore. Excludes are defined as follows:
bucket.scope, andbucket.scope.collection.
-
-
To start the restore, click Restore Backup.
There can be a delay while Capella schedules the restore. Once the restore starts, its status appears on the Cluster page. The restore automatically recreates any missing buckets. Capella also adds backup and restore events to the Activity Log.
Restore Indexes
|
Permissions Required
To access indexes in the Couchbase Capella UI:
|
If GSI indexes were included in the bucket you restored, they’re automatically restored in a round-robin fashion among the current nodes running the Index Service. These indexes are created, but not built.
Indexes are created and not built because Couchbase Capella does not know the optimal index topology ahead of time. By not building the indexes, Capella gives you the option to manually move each index between nodes and build them yourself. However, if you find the automatic index distribution acceptable, you can use the Capella UI to rebuild each index.
- To Rebuild an Automatically-Restored GSI Index
-
-
Open the Indexes page for your cluster:
-
With the Projects tab in your organization open, select the project with the cluster you want.
-
With the Operational tab open, select your cluster.
-
Click the Data Tools tab.
-
In the navigation menu, click Indexes.
-
-
Each restored index displays a status of Created. In the Status column, click the Play icon for each index you want to rebuild.
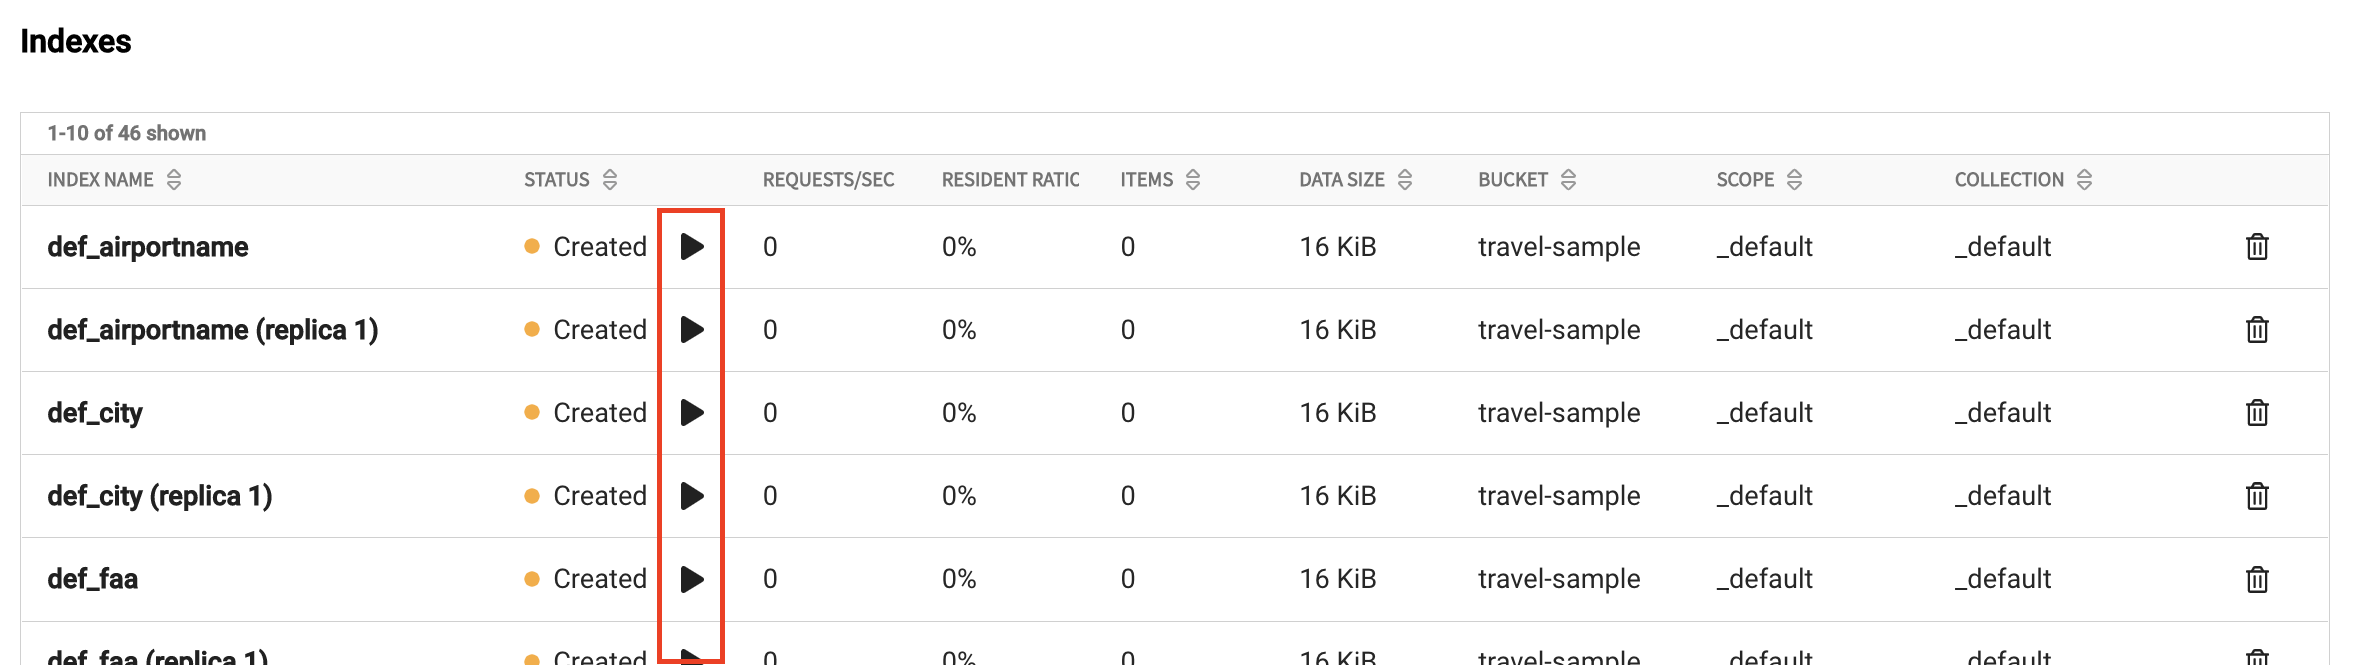
Each index you build displays the Ready status when the process is complete.
-
View and Restore a Downloaded Bucket Backup
When downloaded, you can unzip a zip archive file and use the Couchbase Server cbbackupmgr utility to view, examine, or restore the contents of the bucket backup repository.
For more information about the download file, see About the Zip Archive File.
For more information about the cbbackupmgr utility, see cbbackupmgr in Command Line Tools.
If you’re running cbbackupmgr commands against Couchbase Capella clusters with the cluster access credentials, there are some cbbackupmgr disable options that you must use. These restrictions do not apply if you’re running cbbackupmgr commands against your self-managed clusters, using the downloaded backup archive.